Product Manual - Zimbra Converter
The complete Zimbra to Outlook conversion works in 3 Levels, here have a look at them in detail
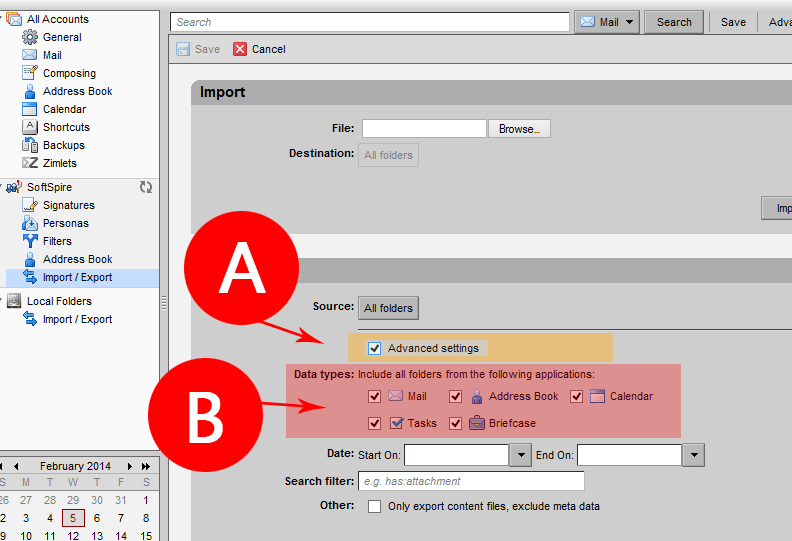
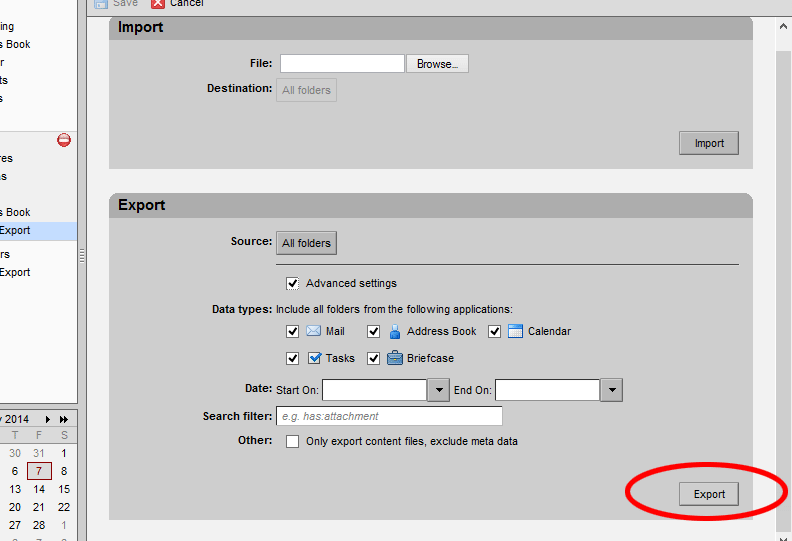
- First, Export TGZ files from Zimbra
- Second, convert TGZ files into PST format
- Last, open converted PST in MS Outlook
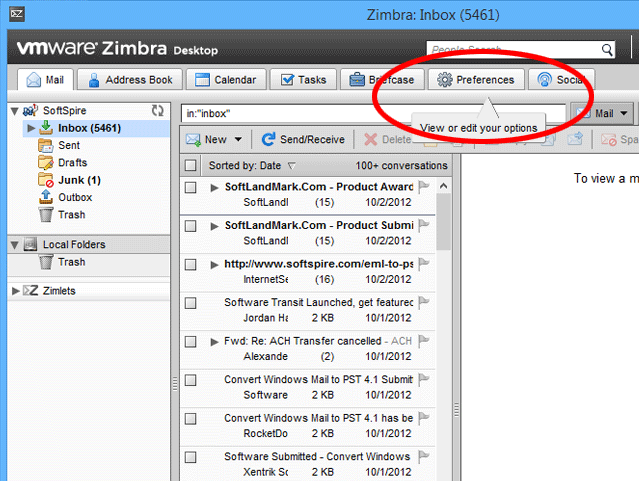
First, Export TGZ files from Zimbra
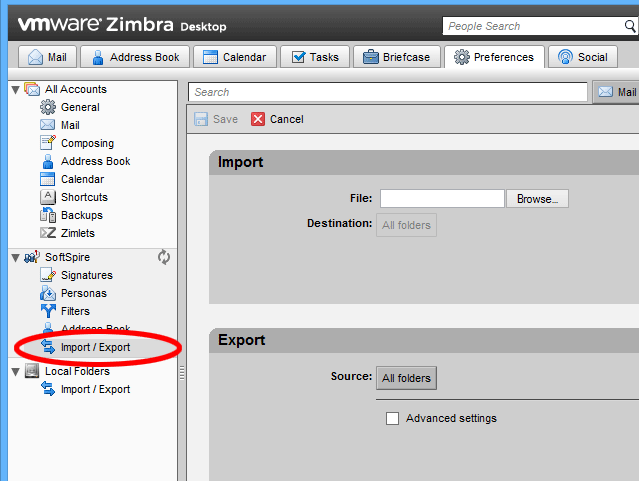
In few seconds all the files will be exported, Next unzip the exported files
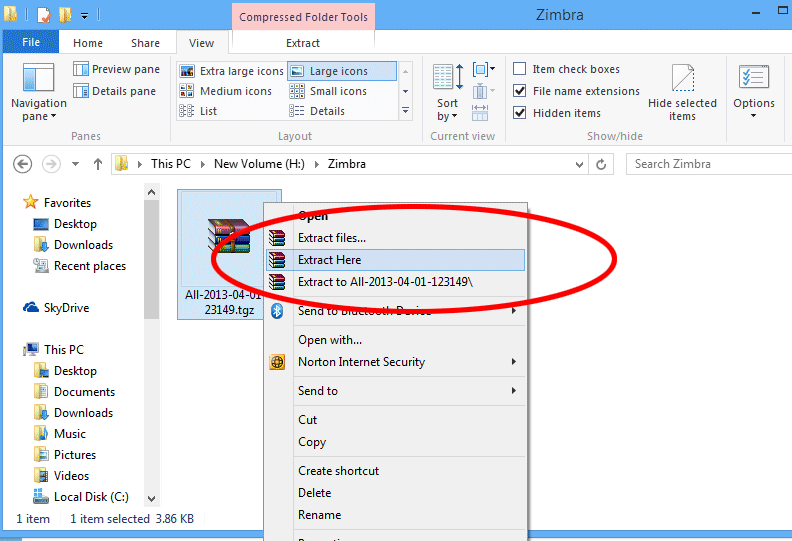
In few seconds the TGZ file will be unzipped
Second, convert TGZ files into PST format
Start Menu » Programs » Zimbra Converter » Zimbra Converter
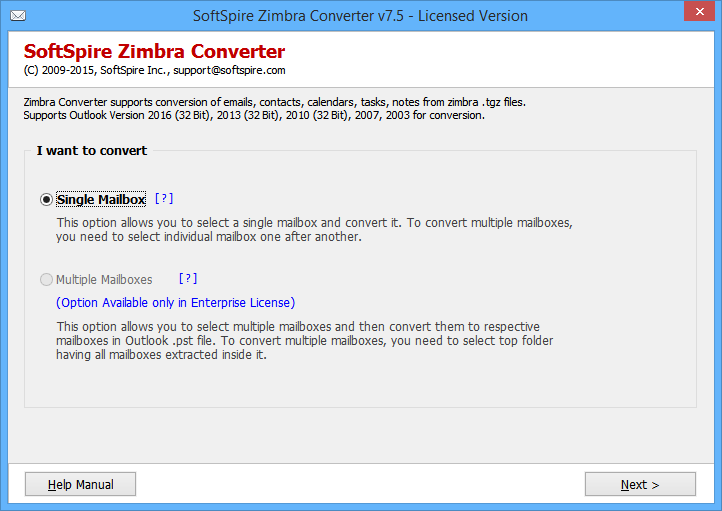
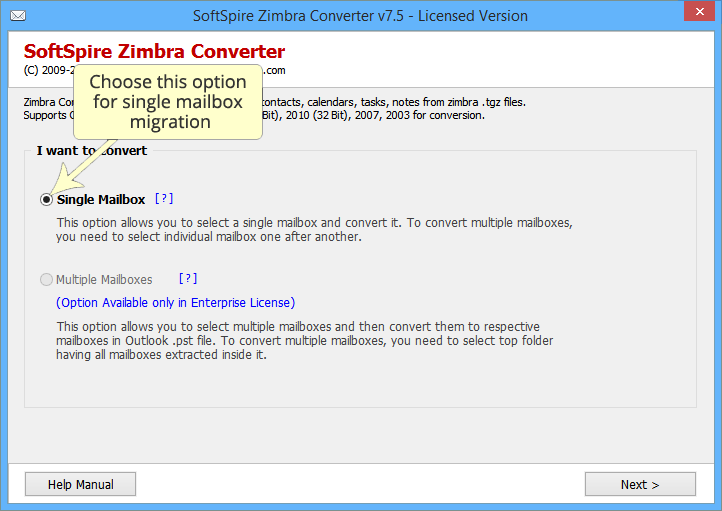
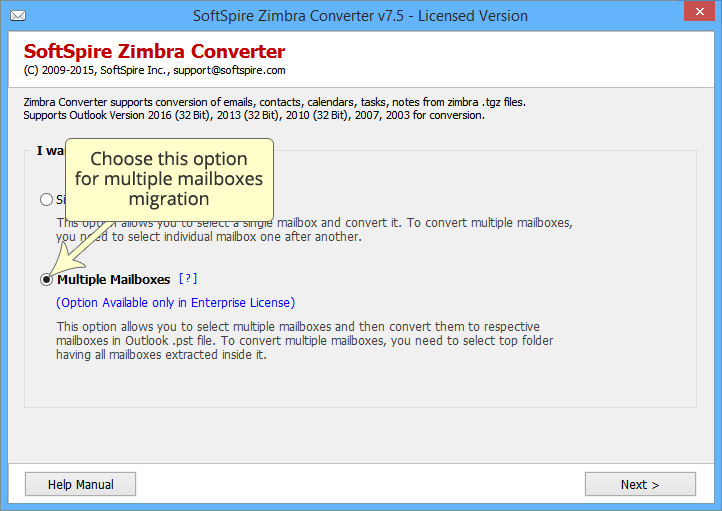
Here you will see that the software provides 2 migration option
Single Mailbox – It allows to select 1 mailbox for conversion & save the entire mailbox in 1 PST only.
Multiple Mailboxes – It allows you to select multiple mailboxes saved in a single folder & save each mailbox in separate PST file.
Choose Single Mailbox & click on Next
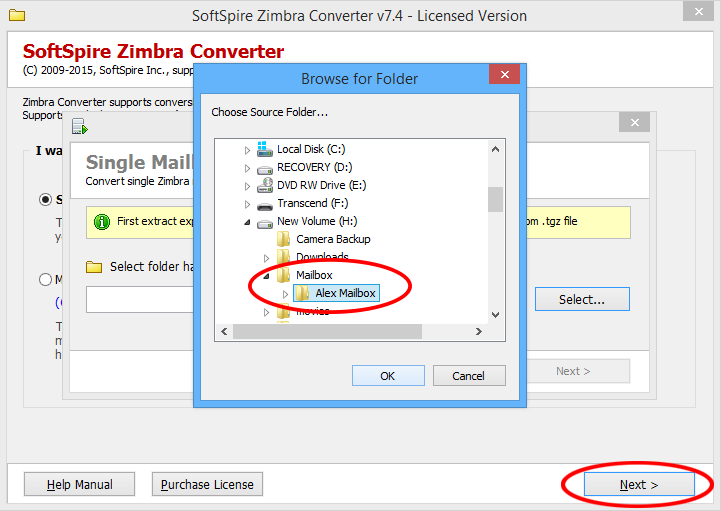
Click on select button to choose Zimbra Mailbox & click on Next
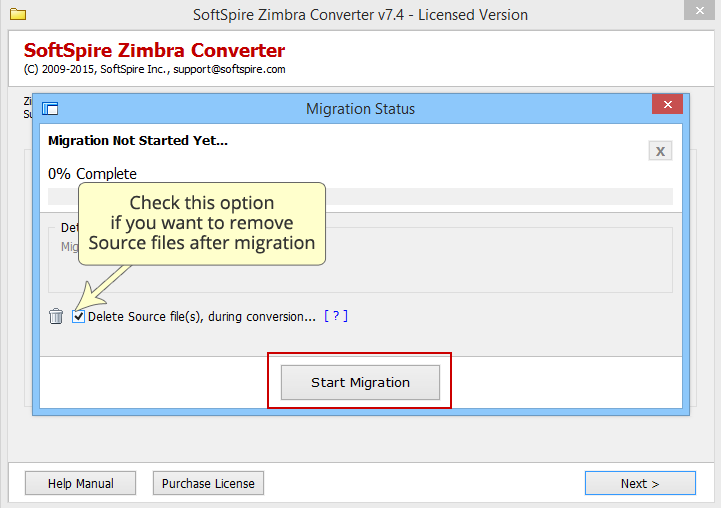
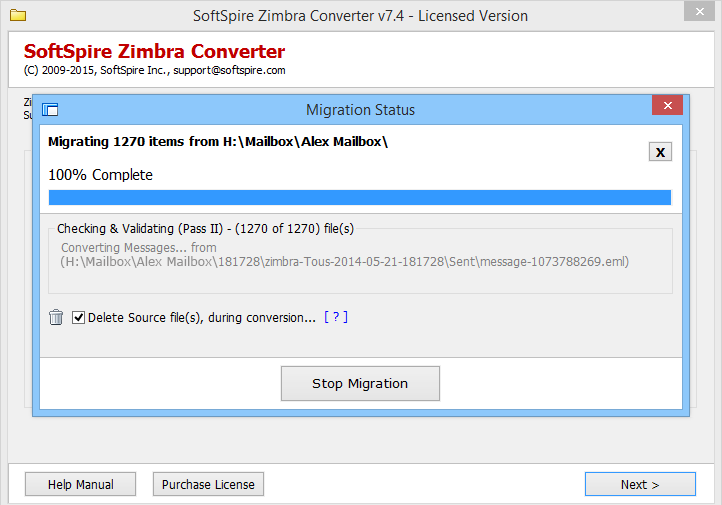
As next Window appear, you are given the option to deleted data from source file location after conversion, for that check on "Delete Source Files, during conversion…" or leave it blank to keep the files & click on Start Migration
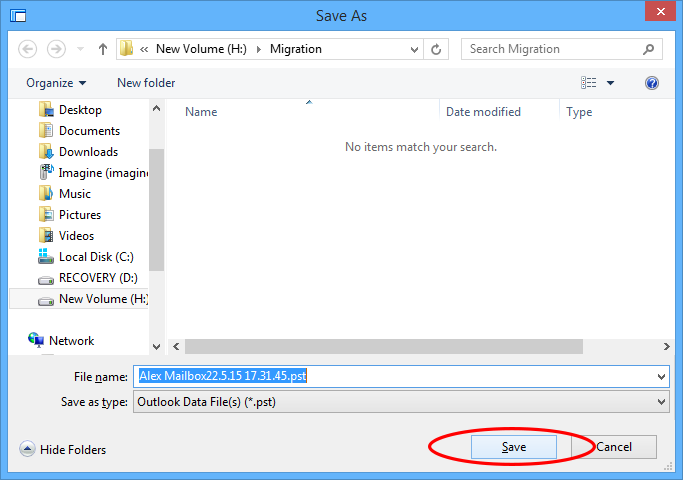
Software then ask to choose a location to save the files & then the conversion will start
Once conversion is done you get this message
Choose Multiple Mailboxes options & click on Next
Click on Select button to choose the folder having all mailboxes, extracted from Zimbra TGZ files
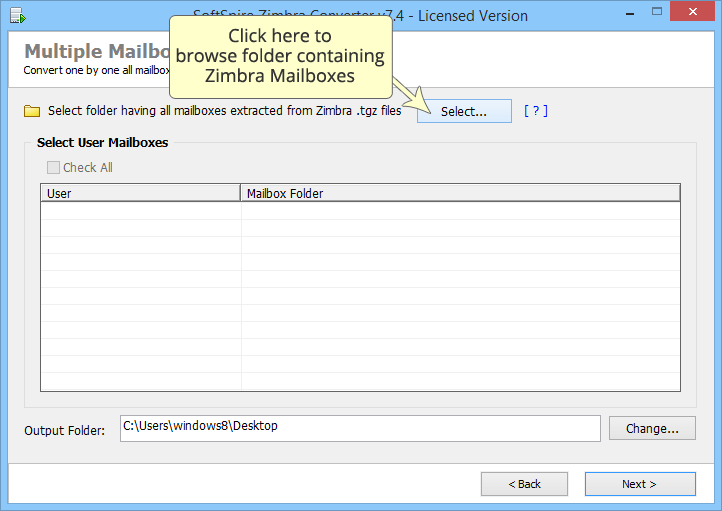
As the software show you the list of all selected mailboxes, click on Check All option to choose all the mailboxes for conversion at once. Uncheck those folders, you do not want to convert.

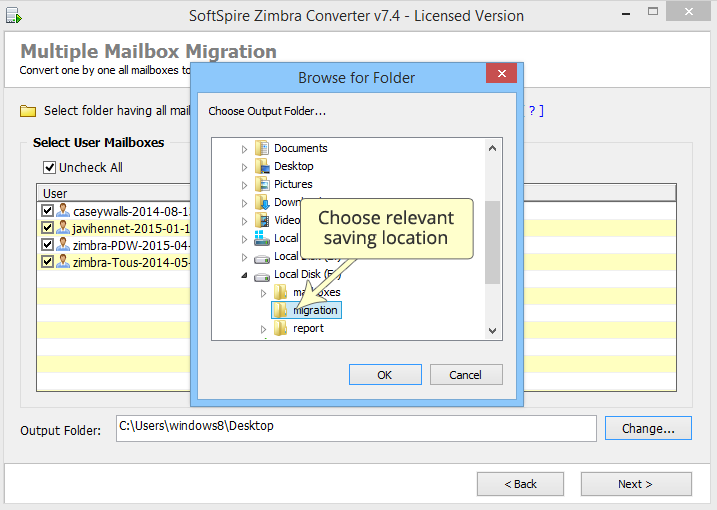
Click on Change button to choose location to save the converted files
As next Window appear, you are given the option to deleted data from source file location after conversion, for that check on "Delete Source Files, during conversion…" or leave it blank to keep the files & click on Start Migration
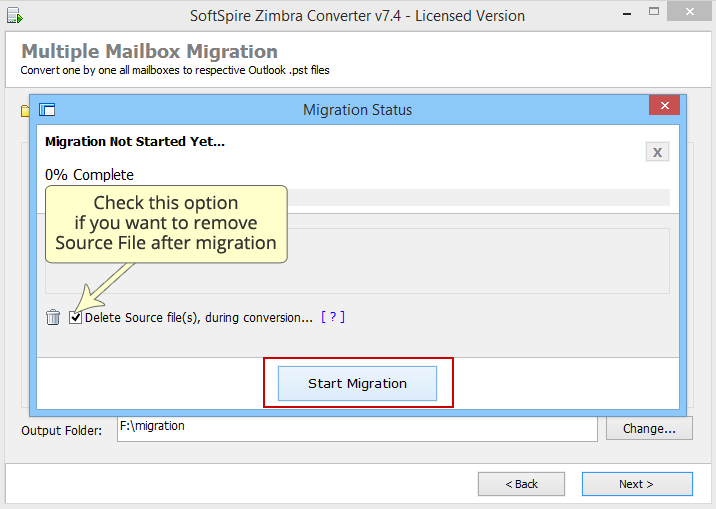
Once conversion is done you get this message

Last, open converted PST in MS Outlook
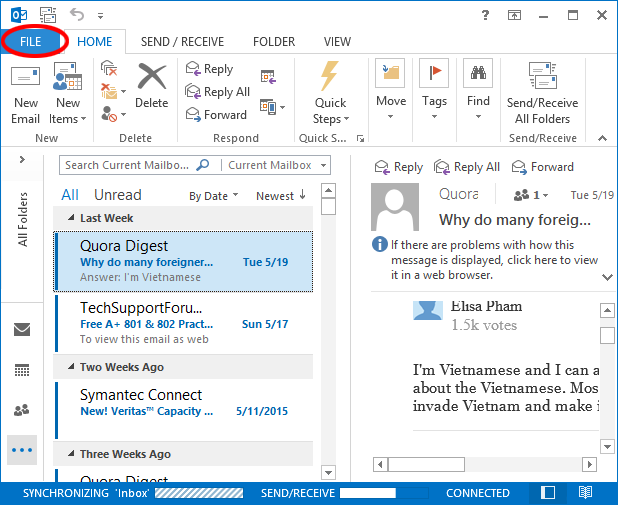
Go to File
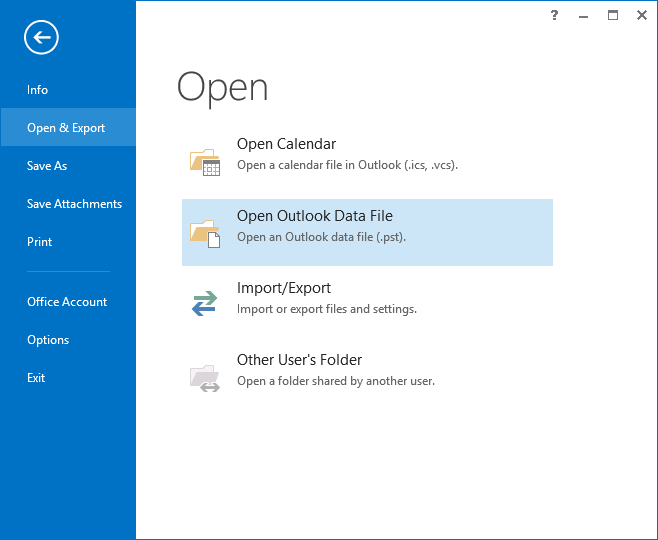
Open » Open Data File
Browse & select the PST file from location
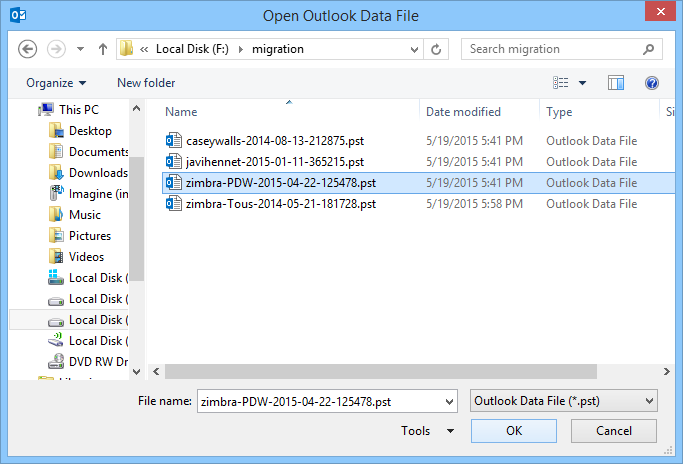
And view the file in MS Outlook, repeat the process to open multiple PST files